
Developer Guide: z-PAX Sandbox Environment
Overview
This page outlines the procedures for developers to integrate, view, and test their applications within the z-PAX sandbox environment. The sandbox provides a controlled setting that enables developers to validate application functionality, design, and performance. Applications can be evaluated in both tile view and full view modes to ensure proper rendering and behavior prior to deployment in the production environment.
Access PointThe sandbox environment can be accessed at https://sandbox.myzpax.com/sandbox/home.
myzPAX Portal Dashboard Overview
The myzPAX Portal features two distinct sections within the main dashboard, allowing developers to view and manage their modules and applications effectively.
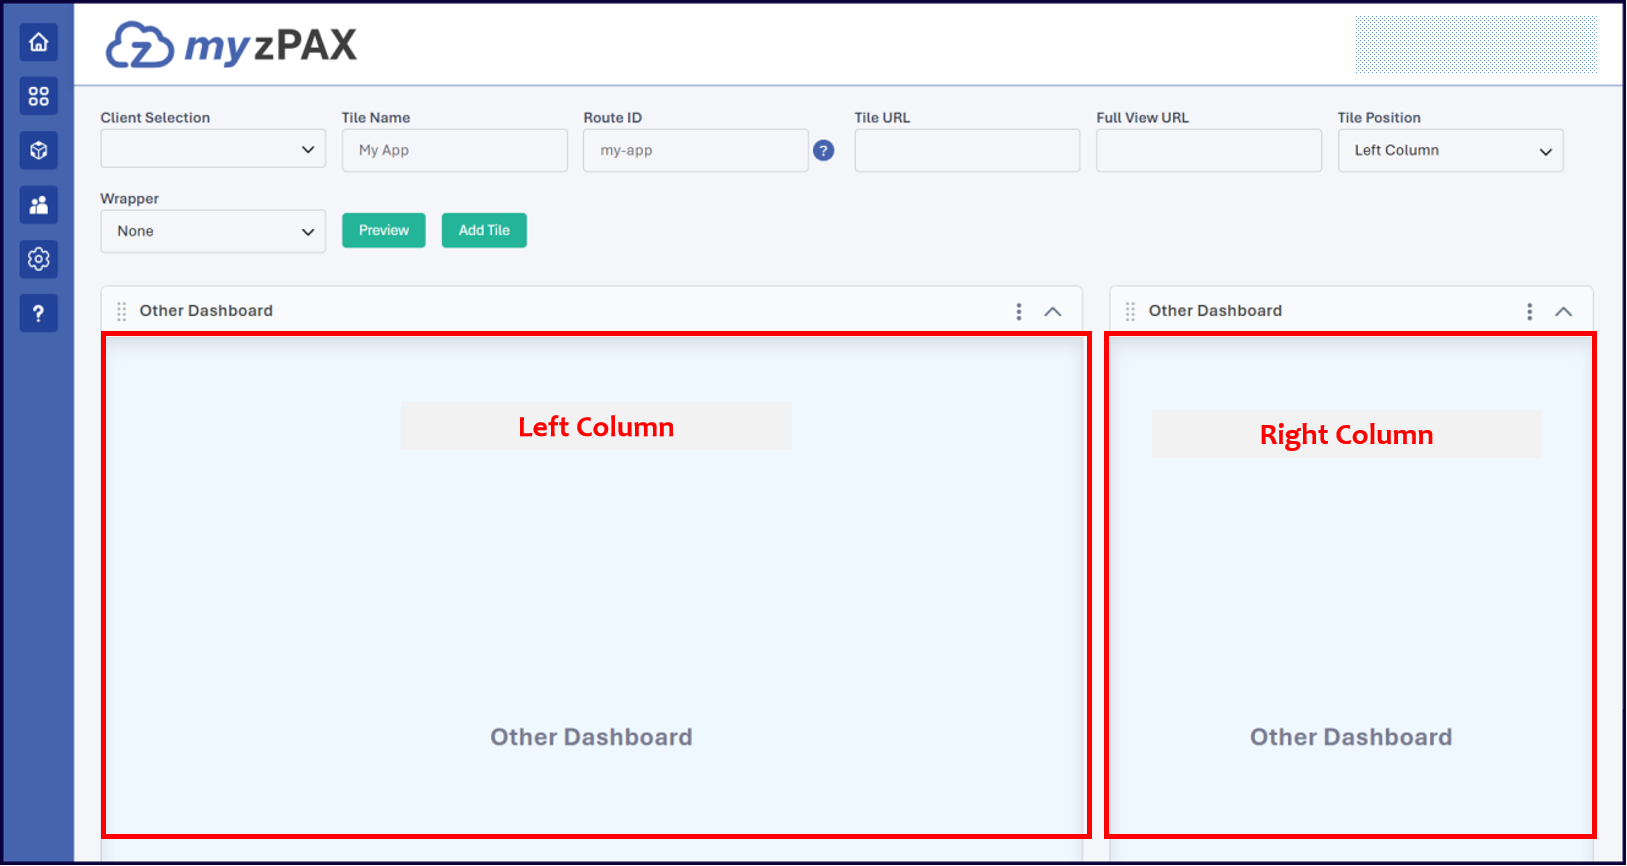
Right Column
- Purpose: Designed for tiles that occupy smaller display areas.
- Ideal Use Case: Applications presenting text-based content, such as blogs or news feeds.
Left Column
- Purpose: Designed for tiles that occupy larger display areas.
- Ideal Use Case: Applications displaying data visualizations, including graphs, reports, or maps.
In both cases, the tile layout and sizing follow the Design System Guide provided by the z-PAX team.
Application View Modes
Within the myzPAX Portal, applications can be presented to end users in two distinct modes: Tile View and Full View.
Tile View
The Tile View presents a condensed version of an application. Developers use this mode to display a summarized interface containing selected functionalities from the full application.
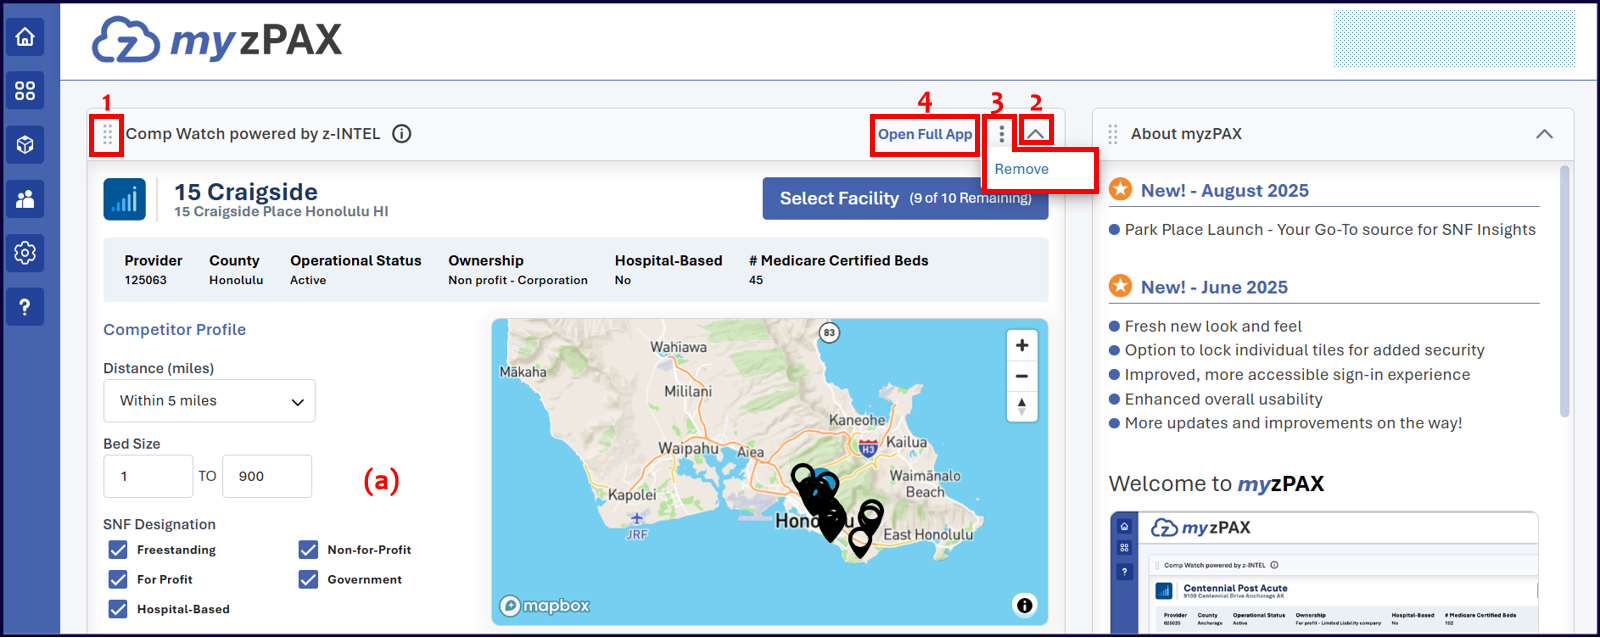
End users can interact with tiles in the following ways:
- Drag and Move: Users can drag and reposition tiles within their designated column.
Tiles in the left column can only be moved within the left column, and tiles in the right column can only be moved within the right column.
- Expand and Collapse: Expands or collapses a tile to adjust its displayed content area.
- Remove: Removes the selected application tile from the dashboard and places it in the App Tray.
- Full View Mode: Opens the complete version of the application within the z-PAX banner.
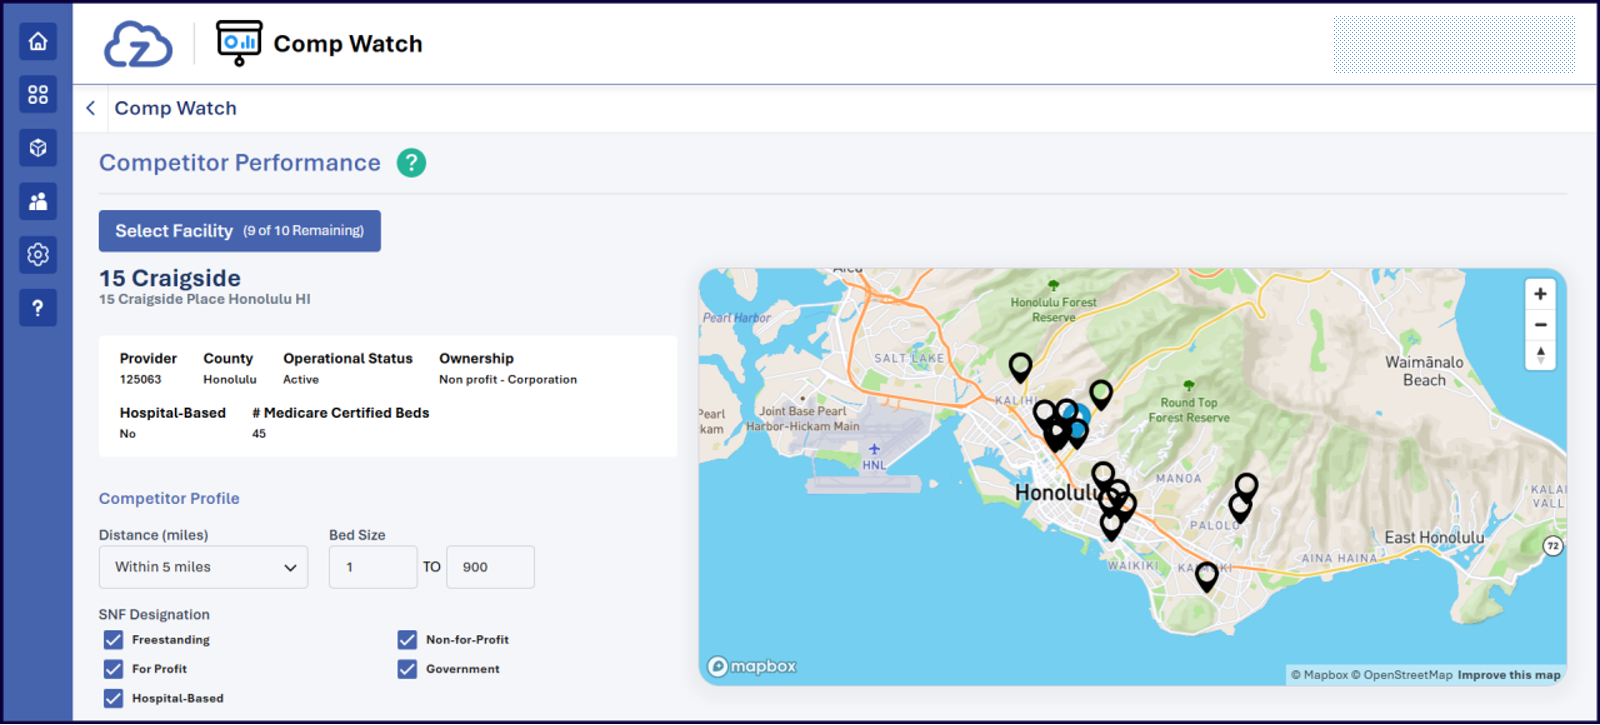
Full View
The Full View mode provides access to the complete version of the application. In this mode, users can interact with all available features and functionalities without the layout or feature limitations of the Tile View.
Setting up Tiles and Testing Your Applications
Each application tile in the myzPAX Portal requires specific configuration parameters to ensure proper display and functionality within the dashboard. The following fields must be defined when setting up a tile via the access point:
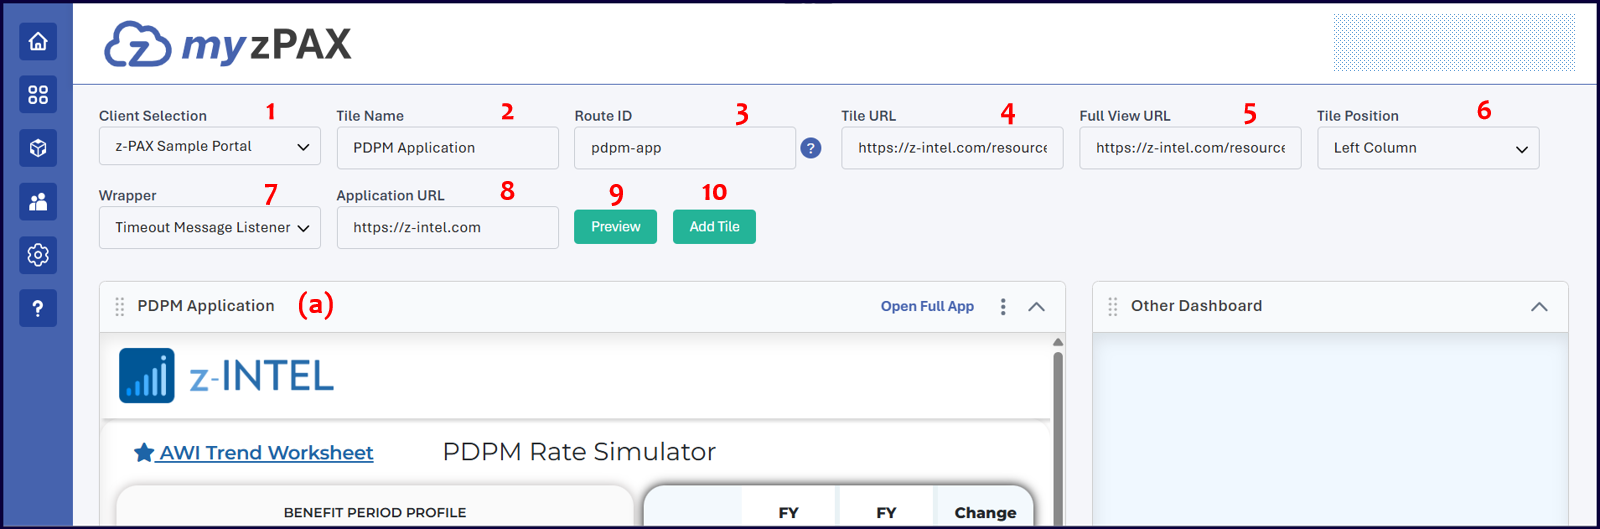
- **Client Selection:**Specifies the client on behalf of whom a tile is added or edited.
This field is visible only to internal administrators. Client administrators do not see this dropdown, as they have access only to their assigned client.
- Tile Name: Specifies the exact name displayed on the tile (a). This label appears to users when navigating to your application.
- Route ID: Specifies the unique identifier used to reference your application within the URL. For example, if the Route ID is
pdpm-app, the corresponding full view URL is:https://sandbox.myzpax.com/pdpm-app. - Tile URL: Specifies the initial URL loaded within the tile, embedded as an iframe.
- Full View URL: Specifies the URL that provides users access to the full version of the application in a full-screen view. Ensure that this URL is both publicly accessible and secured.
- Tile Position: Indicates the column placement of the tile within the portal layout - either the Left or Right column.
- Wrapper: Select Timeout Message Listener to allow the embedded application communicate with myzPAX. For example, you may add a button in the embedded application to ask myzPAX to show a mini video player within myzPAX.
- Application URL: Defines the primary URL embedded within the tile as an iframe. This URL should display the main content relevant to the tile view.
Applications that include a restricted
X-Frame-Optionsheader cannot be embedded within a tile. For more information, refer to X-Frame-Options.
Click Preview (9) to display a preview of the application in the tile, or click Add Tile (10) to publish the tile to the myzPAX home page.
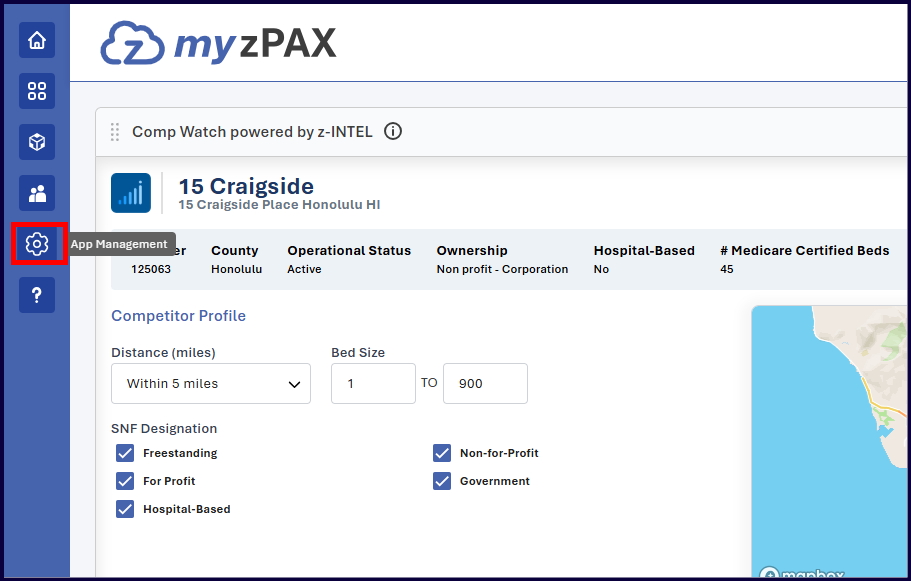
App Management
You can access the App Management window by clicking the cog-wheel icon on the home page.
All applications created using your administrator account are listed in the App Management window under the App Details tab. If you are an internal administrator, you can list the applications by client using the Client Selection dropdown.
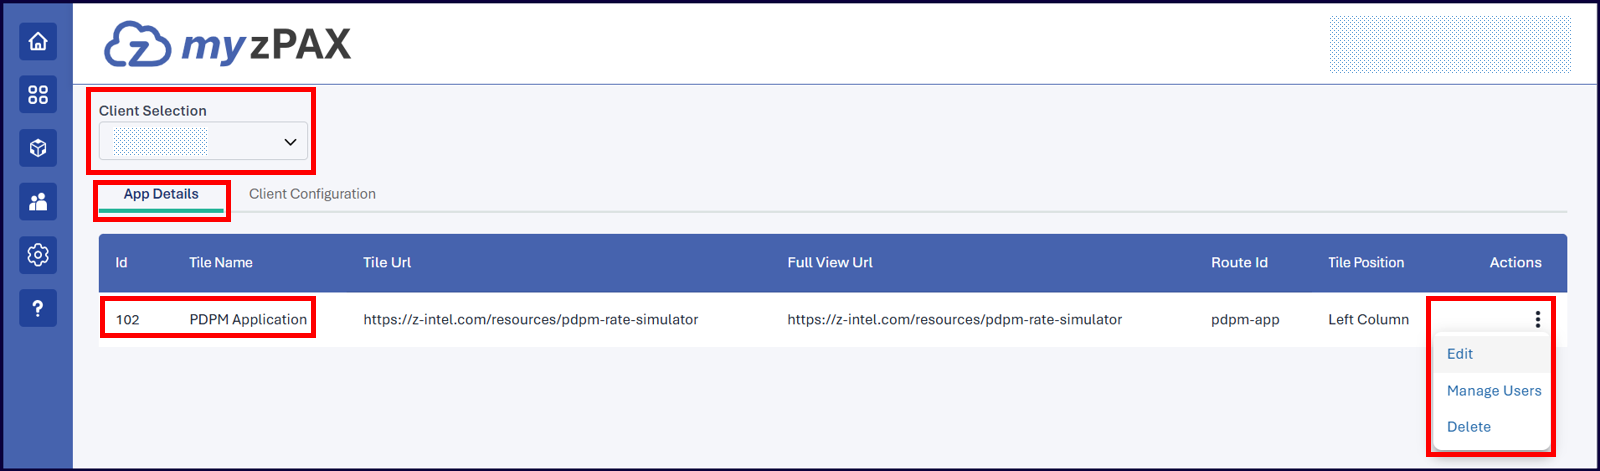
You can perform the following three actions on each embedded application from this window.
-
Edit: You can edit any of the information provided while creating the tile.
-
Manage Users: Choosing Manage Users navigates to the User Management window associated with the specific application.
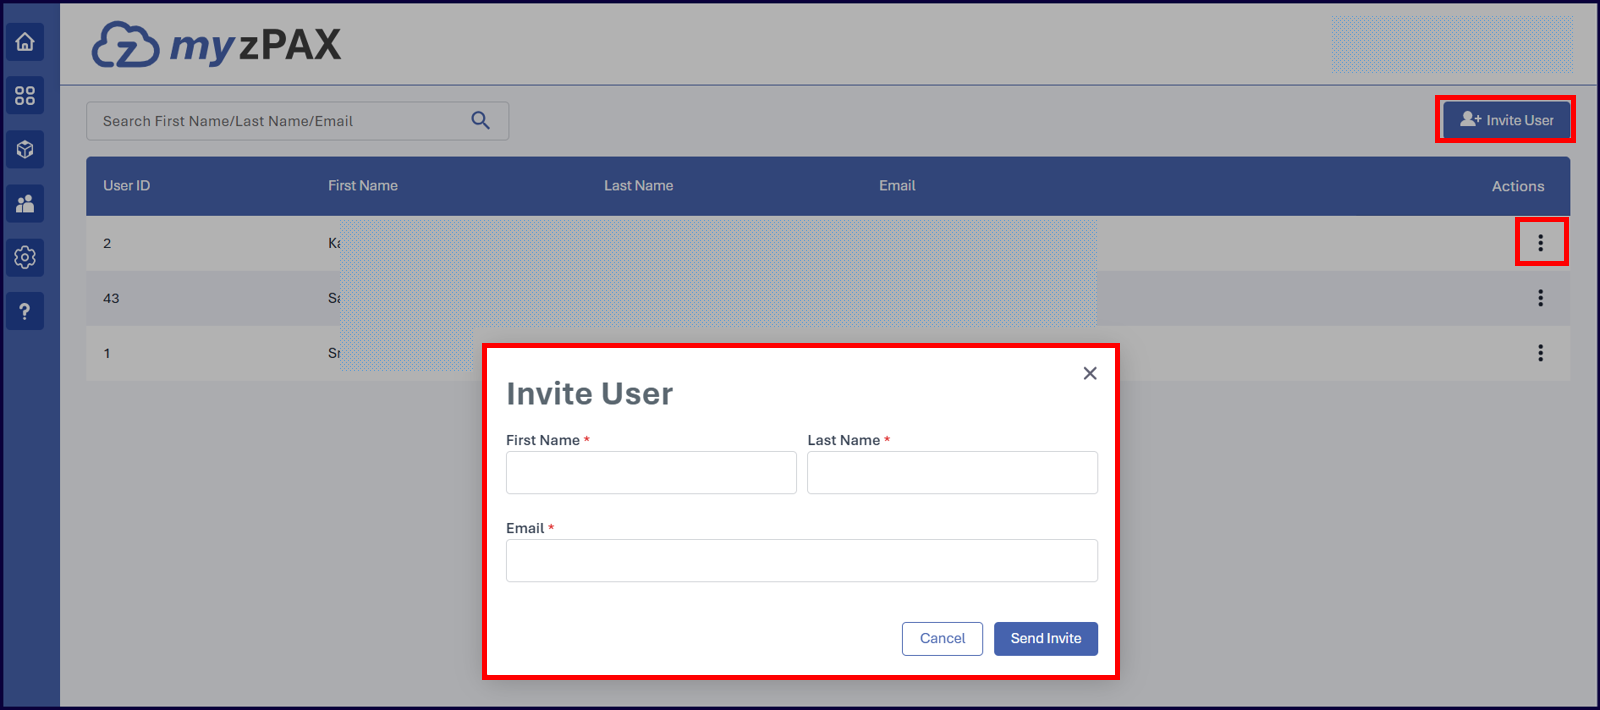
You can view the list of users who currently have access to the application and you may remove access for any user by clicking the Vertical Ellipsis menu under Actions.
Click Invite User to open the Invite User pop-up to enter the details and invite a new user to access the application.
Client Configuration
The Client Configuration module can be accessed via the Client Configuration tab in the App Management window.
This module contains key settings that determine how an application integrates with and authenticates through the myzPAX Portal. These settings control client identification, authentication behavior, and redirect handling during user login or validation flows.

You can configure the following fields:
- Client Name: Specifies the name of the client application embedded in the myzPAX Portal.
- Access Token Lifetime (in minutes): Defines the duration, in minutes, for which the access token remains valid before expiration.
- List of Redirect URLs: Lists the authorized callback URLs to which the myzPAX Portal redirects users after successful authentication or validation.
Use Add More to include additional redirect URLs. - List of Fallback URLs: Specifies predefined URLs used to route users to alternate destinations (typically the marketing page of an application) when the user does not grant consent or does not have the required permissions or entitlements to access the application.
Use Add More to add additional fallback URLs.
Save Configuration
Use Edit to modify configuration details and Save to apply any changes.